Designer tip: avoid white lines on your final print by following these steps

Have you ever created a marketing masterpiece in Adobe InDesign or Illustrator, only to export for print and see white lines where they shouldn’t be? Here are some tips to determine whether they will or won’t pose a problem when it comes to print.
1. Always use Adobe Acrobat to check the artwork before sending it to the printer. Don’t use Preview (for Mac users), your default web browser, or any other PDF reader and expect it to be accurate.
2. Zoom in and out! If the white lines change position or remain the same weight, then they are screen artefacts called stitching which don’t pose a problem when printing at high resolution. This is just means the artwork file contains transparency.
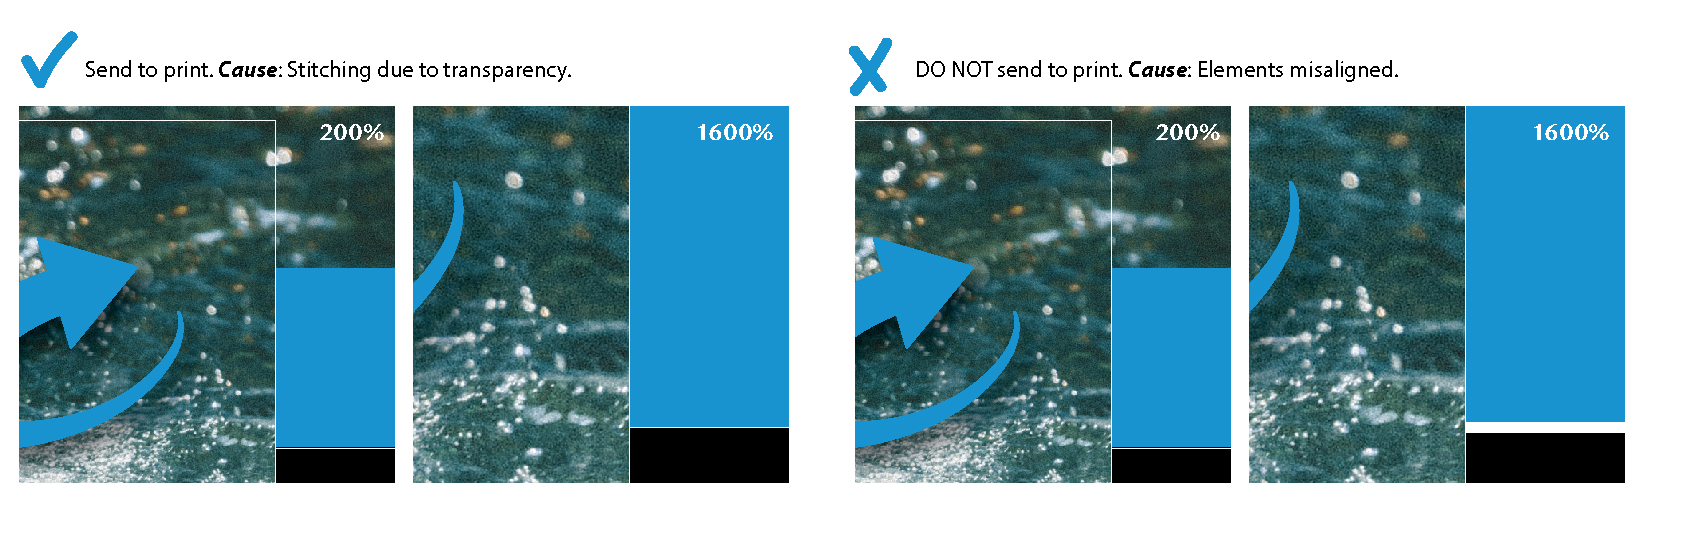
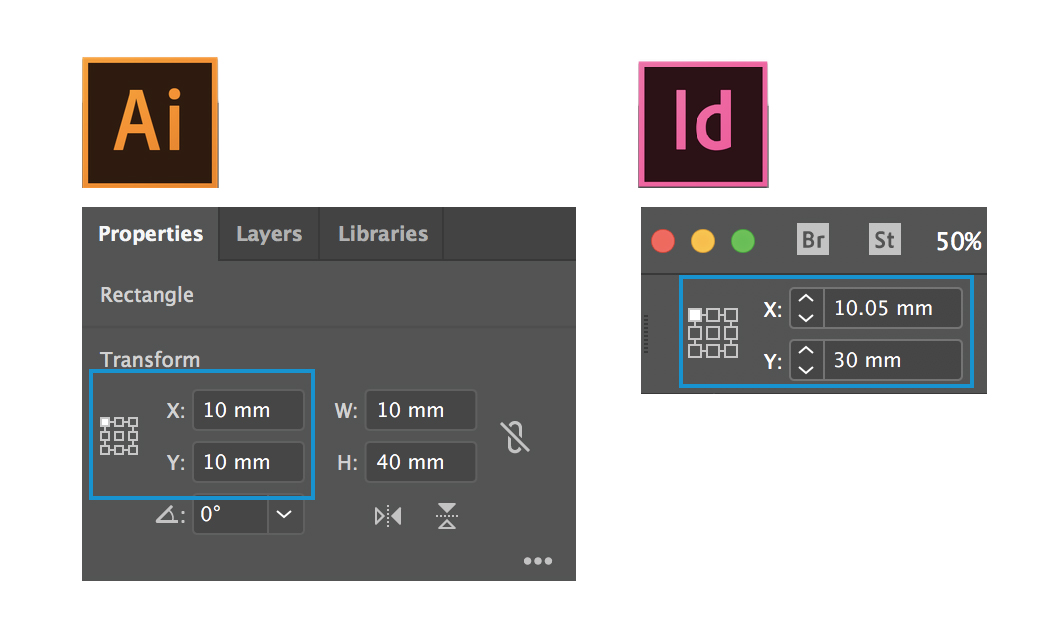
3. If the position of those white lines stays in the same position and get thicker when you zoom in, then there is an issue! It’s very likely they indicate a gap in the design elements. Go back to the original file and check that the X and Y coordinates align correctly.
4. If the artwork contains many layers, flattening may be necessary. The easiest way to ensure the artwork is flattened, is to make sure that when you export it, you’ve selected compatibility with Acrobat 5 (1.4) or later.

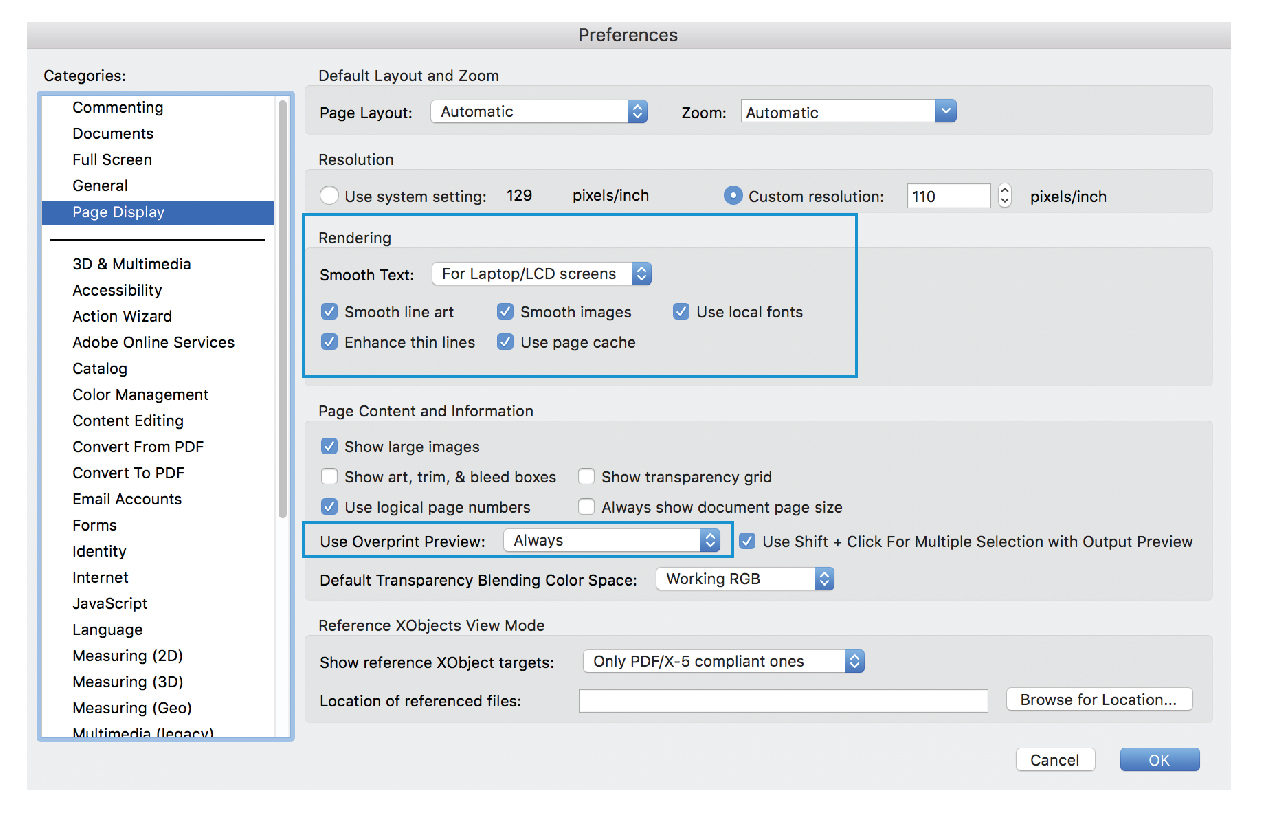
5. Lastly, set Page Display preferences in Acrobat to Always use overprint preview. In addition, ticking Enhance thin lines and Smooth images in the Rendering section may also help you.
For more design tips and tricks, visit the Progress Printing blog.